Tuesday, August 6, 2013

Staining the Body

I decided some time ago to have a sunburst finish on the front of the guitar.  I looked up some videos on YouTube about how to apply the finish and it looked pretty easy with the spray finish I chose.  The back and sides I wanted to darken up somewhat, but not change drastically.

I stained the walnut back and sides first.  As with the wood filler, I taped over the inlay on the spine and tail because I did not want them to be stained.  I taped over the binding as well.

The color I used on the walnut was called tobacco brown.  Here's what the back looked like after staining:


You can still see the wood grain but it is a bit darker.  I'm not completely in love with it, but not too bad.

The fun part was staining the front.  I started by staining the entire front with a color called vintage amber.  I taped over the sides and the neck opening before spraying.  I also stuffed some paper in the sound hole to keep from spraying the inside.


Next, I sprayed a red mahogany around the edges.  This is done by spraying to the opposite edge of the face so that you only really hit the edge.  That leaves a gradually thicker spray as you move to the edge.


I sprayed the red in a wider band than the brown I put on top of it.  That leaves a brown-red-yellow sunburst effect.  With the red and brown I covered the rosette as well.


Once the stain was dry, I removed the tape and cleaned off any stain that was on the binding.  For effect, I propped up the neck on the body for this picture:


Some thoughts about this step...

I didn't mention it before, but I used a sanding sealer between the filler and the stain.  Then for some reason, the front looked fine after staining, but the back and sides had some strange spots.  I couldn't make them better by spraying more so I eventually sanded off all the brown and started over.  Various parts of the body, notably around the edges of the front, seemed to have the grain raised up after spraying.  I'm not sure if they got too wet with stain or if I just didn't sand them well enough.  Hopefully, I can fix this after the clear coats.  I'm not overly happy with the vintage amber on the rosette.  I don't know if it would have been better unstained or not because I am also not thrilled with the look of the unstained inlay on the spine and tail.


Friday, July 5, 2013

Wood Grain Filler on Body

Before applying a finish to the body of the guitar, I needed to fill the pores of the walnut with a wood filler.  Walnut is very porous and if you look closely you can see lots of holes in the surface.  The wood filler fills those holes without changing the appearance of the wood too much.  I used a medium brown tinted filler.


I taped off the inlay on the spine and on the tail to protect them from the filler and painted the filler first on the back and then later on the sides.  Here's the before and after on the back.  The blue stripe is the tape over the inlay before the filler was applied.  The second picture was after the back had been scraped and sanded, leaving it much as before, but with the filler in all the holes.


You can see that the appearance did not change much, but you can really tell a difference when you run you hand across the back.  It is much, much smoother now.

I did the same process on the sides.  Here's a picture with the filler applied.


The front is curly maple and it does not need a wood filler.  It is not a porous wood and so I could skip it.


Saturday, June 22, 2013

Fretboard

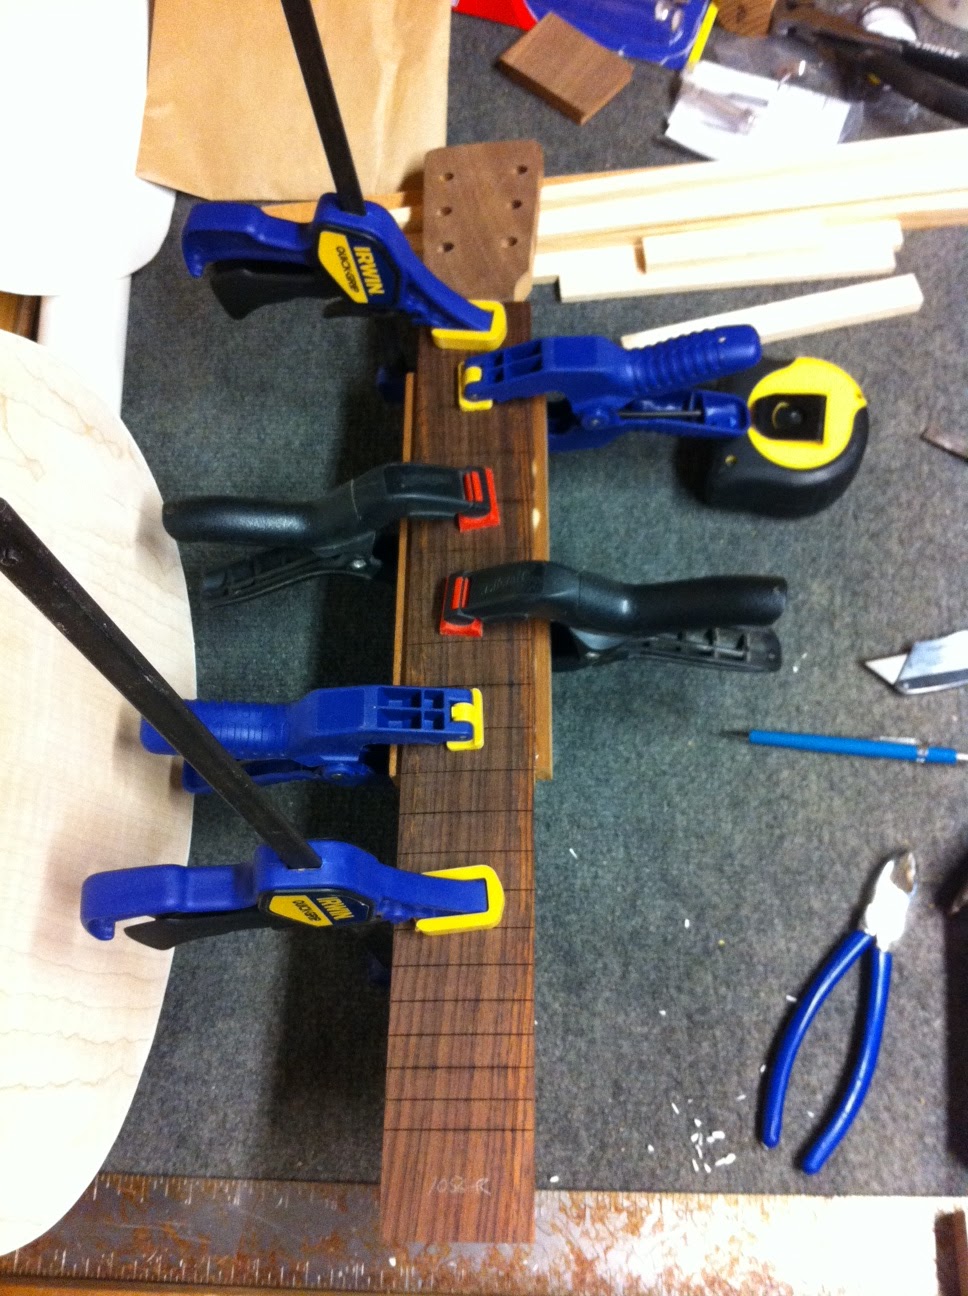
I chose to purchase the fretboard already made instead of trying to make it myself.  The location of the fret slots and the curve of the board face made me think I would probably not get it right.  So I bought the board and I bought about 6 ft of fret wire.  I cut each piece to the approximate length and tapped it into the slots with a hammer.  I realized after I started that I was supposed to glue them in.  But the ones I had done already were in pretty tight and I could not easily get them out so I left them.  The ones below where the neck ends seemed to be the ones that required glue to keep them in place.

Here's the fretboard being glued to the neck.
Once the glue dried, I had to trim the combined piece to size.  The top of the neck had already been trimmed to size as had the bottom.  So I just had to draw a line down the back of the fretboard and trim it off.  I made a sled for my table saw and clamped the neck piece to that so I could cut the angle correctly and not worry about having the piece move around making the cut not straight.  Here's how it looked after trimming to size.
And here it is after starting the frets and then after putting all the frets in place.


And finally, with this much of it done, I wanted to see how it was looking as a complete guitar.  So with the pieces together just enough to lean against the wall, here's an idea of how it will look in the end.


Friday, June 7, 2013

Gluing the Bindings

I first tried using the same wood glue I've used elsewhere on the bindings.  It did not stick very well to the plastic.  So I switched to Gorilla Glue and it worked much better.  The only problem was the squeeze-out.  Here are the pictures from gluing.


And here is how the front and back look after the glue dried.  There is clean-up to be done on the glue squeeze-out.


Sunday, June 2, 2013

Tail Inlay

I clamped a thin, flat piece of wood to the tail end of the guitar to serve as a router base and then clamped a straight-edge to that for a router guide.  I routed the channel for the inlay on the tail just as I did for the back spine.  Here's how it looks after gluing.  I'll trim it to length as I install the binding.


Tuesday, May 28, 2013

Routing a Channel for the Binding

I decided to go with some plastic binding thinking it would be more sturdy.  And to save some work, I decided to not use any purfling.  To cut the channel for the binding, I made a jig that included my router.  The reason for this is because if you just run the router around the edges using the front or back as the router base you will end up with a channel that is not straight.  The panels are not at 90 degree angles with the sides.  So the jig uses the sides as the router guide.

I got the idea for the router jig at this web page:
http://gicl.cs.drexel.edu/people/sevy/luthierie/guitarmaking_guide/binding/binding.html

I started with the piece of wood I used when routing the groove for the rosette.  It was already drilled through for the router base.  I mounted that piece vertically on another piece of wood that I could clamp to the workbench.


Around and in front of the router bit opening is a thin piece of wood that the front or back panel will ride on during routing.  Then coming straight out from there is a piece of wood that the guitar side will sit on as the guitar is rotated through the cut.


I adjusted the cut to where it needed to be and secured the side guide as shown above.  Then I routed a piece of scrap wood and tested the fit with a piece of the binding.


With much hesitation, I ran the guitar through the jig, front and back.  Some spots needed to be hit twice if I did not have the guitar firmly against the jig.  Here's the same piece of the binding sitting in the groove I routed in the back of the guitar.


Finally, here's a bigger piece of the binding being held in place.  I'll glue it soon.  Before that I must complete the routing on the tail end that will have some of the same inlay as the back.


Monday, May 13, 2013

Trimming the Panels

After gluing the back panel on, I cut both the front and back panels to size using a flush trim router bit.