
Tuesday, December 27, 2011
Sides
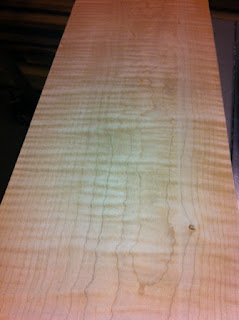
I rough cut the sides much like the front and back panels. But since they are 4" wide and 36" long, I was able to completely cut them with the table saw with no need to finish with a hand saw. Here are the sides after planing them to about 3/16" thick. I'll have to hand plane them another 1/16" or so.

Back Panel
Making the back panel is just like making the front. This time, I am using black walnut which came in a 2" thick slab. I cut two thin pieces as before (first a groove all the way around with the table saw and then finish with a hand saw).
 After that, I planed each piece to about a quarter of an inch and then hand-planed the edges and glued them together.
 Finally, I rough cut the panel to the size of the guitar template with a half inch of spare material all around.


Sunday, December 25, 2011
Front Soundboard
I chose a curly maple wood for the front soundboard. I bought a 3/4" thick piece of lumber for this.

I took the resulting two pieces and ran them through a planer to smooth them out. Then I brought them to my bench and hand-planed them smooth on one edge.
 I followed the book's recommendation to perform "candling" on the resulting joint. Once I verified that I could not see any light through the seam, I glued the edges together.
 You can see in the picture above that I then drew the outline of the soundboard on the maple. Then I cut out the shape, allowing about a half inch all around the outline.


Since I don't have a band saw, I had to work a little to turn this piece into two book-matched pieces for the front panel. I used a table saw to cut the a 3 inch groove all the way around the piece. Then I used a handsaw to finish the cut leaving me with two pieces that were about 1/4" thick, 24" long and 10" wide.

I took the resulting two pieces and ran them through a planer to smooth them out. Then I brought them to my bench and hand-planed them smooth on one edge.


Truss Rod Part II
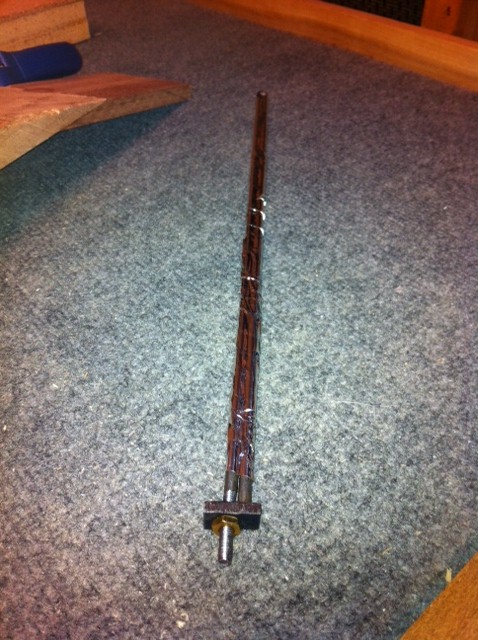
I received the die I ordered and threaded the end of the rod. Then I took a piece of 3/4" x 3/16" metal bar and made the part of the truss rod that holds it in place. The threaded end of the rod goes through the bar and the shorter end fits in a stopped hole drilled part way through. Finally, the truss rod is wrapped in metal tape. I was not able to get the rod wrapped smoothly, but I think it will be okay.
The only other issue I have is that I have not yet found a brass standoff. I only have a brass nut. The book recommends a standoff because you can more easily turn the nut. It is important to use brass so if any thread gets stripped it is the nut and not the rod. You don't want to try replacing the rod down the road.

I'm still waiting on the router bit I ordered so I can't install the rod yet.
The only other issue I have is that I have not yet found a brass standoff. I only have a brass nut. The book recommends a standoff because you can more easily turn the nut. It is important to use brass so if any thread gets stripped it is the nut and not the rod. You don't want to try replacing the rod down the road.
I'm still waiting on the router bit I ordered so I can't install the rod yet.
Wednesday, December 21, 2011
Truss Rod Part I
Inside the neck of the guitar is a metal truss rod. This is used to counteract the constant pull of the steel strings that deform the neck shape over time. Although you can buy these rods, I thought I'd follow the instructions and make my own. I started with a 3/16" rod. After heating with a torch, I folded it and hammered the bend flat.

To thread the end, I had to order a die, which I am still waiting for. Once that is done, I'll finish the rod by adding a hex nut and a piece of metal bar that will anchor the rod in the neck plate.
The truss rod fits into a routed groove in the neck. I had to order the router bit and I'm waiting on that as well.
Wednesday, December 14, 2011
Neck Construction Part II
The next step was to glue the heel onto the neck. The heel is made up of 4 blocks of wood, each 3" x 4". This step was pretty simple. Here is the result.
 Yet to be done is to trim the end of the neck even with the heel.

Neck Construction Part I
Because I know I am prone to mistakes on my projects, I decided to use some of the poplar lumber I have to practice on before risking the expensive lumber that will be in the final product. With that in mind, I began the neck construction.
The first thing I did was to take a piece of 1”x4” poplar and cut it down to about 3 feet long. From this piece I was to cut both the neck and the headstock. Both of these are to be at a 15 degree angle where they will be joined. My first mistake (I told you I make mistakes) was cutting this piece at an angle of 75 degrees instead of 15 degrees. Oops. Realizing this is when I also realized that the 15 degree angle would be much tougher than I thought to cut. My book says to cut with a hand saw and plane the cuts smooth. I think this is much more difficult than with power tools and much less likely to give the intended results. So I started looking at my options. The first option was to use the table saw. To do this, I have to stand the wood up vertically as I move over the blade. This involves making a jig and cutting one edge at a time. Possible, but not a perfect option.
My second option was the radial arm saw. I found that I could clamp both pieces together along with some other wood to prevent splintering and make the cut through both pieces at once. Doing it this way guarantees that the cuts are at the same angle. So I set out along this road. This worked great, but with two small problems to fix. One is that the body of the saw bumped into some of the wood I used in my clamped bundle. At that point the cut was over even though there was a small corner of the headstock that didn’t get cut. I had to chisel and scrape to even that out. The second problem was that, because of my original angle screw up, my headstock is now a little too short. Oh well, that is what the practice run is all about, I guess.
Disregarding the headstock size, I went ahead and glued the headstock to the neck as described. Here again, there are lessons to be learned. I’m not sure now square the sides of my neck wood are; I never really tried to square them up. When I clamped this on to a piece of wood for the glue-up it seemed to want to roll one way or the other. I should probably square the sides next time. (In fact, I think my table saw blade had not been straight up and down when I ripped the piece). When I started gluing, I found out that my selection of clamps is not quite good enough. I was able to securely clamp the top of the joint (as seen when the assembly is on its side for gluing), but the bottom was not well clamped because my small clamps wouldn't reach the bottom of the joint. And as a consequence I don’t think that side of the joint is glued tightly enough. I could improve this by notching out the board on which I glued so as to allow my small clamps to come in from the bottom. Also, my clamps left impressions on the wood so next time I need to use wood between the joint and the clamps.
Finally, the headstock is supposed to be planed to 1/2”. I didn't do this before gluing. Next time I'll plane it that way BEFORE cutting the 15 degree cut so as not to damage that cut.
Here's how my poplar version of the scarf joint at the headstock turned out. Remember that I'll redo it with lessons learned and using mahogany wood.

Sunday, December 11, 2011
Making the Workboard
The next step is to make a "workboard" for the project. This is a work surface shaped like the guitar that will be used as a base for the construction. I started by tracing the template I just made onto a piece of 3/4" pressboard. Allowing a half inch extra all around plus a 3" wide extension at the neck and heel, I cut out this shape with a scroll saw. (A band saw would have been better, but I don't have one.) I traced the resulting shape onto a second piece of pressboard and cut it out as well. These were glued together to form a 1.5" thick workboard.
Next, the book specifies a border of 1/8" thick cork be glued to the workboard with a piece of paper over the middle. Here's how my board turned out:
 A couple of things to note here. First, you can see in the picture that the cork is at the edge of the workboard. After I had it installed, I realized that the book wanted the cork border to be out to the edge of the guitar template, not out to the extra half inch of the workboard. My cork does continue inside the template border so it should be okay.
Second, the wooden block in the picture will be used later to hold down the soundboard.
Now that the workboard is complete, it is time to start working on the actual guitar.
Next, the book specifies a border of 1/8" thick cork be glued to the workboard with a piece of paper over the middle. Here's how my board turned out:

Second, the wooden block in the picture will be used later to hold down the soundboard.
Now that the workboard is complete, it is time to start working on the actual guitar.
Wednesday, December 7, 2011
Getting Started
About ten years ago, one of my coworkers made his own acoustic guitar. He didn't use a kit; everything was hand made. I had always thought that I might give that a try one day. I guess that day has arrived. I was looking for a new woodworking project to start and that one came to mind.
After doing some online research, I purchased a book called "Guitarmaking: Tradition and Technology." This seemed to be one of the most highly regarded books on the subject. So for the most part I will try to follow the steps laid out in this book and record my progress here.
The first thing I did was to make a paper template of the guitar face. Since I drew it freehand, I only made half of the face and I'll flip it over for the other half. That will keep everything symmetrical.

The body will be 20 inches long and 16 inches wide. I cut this template out in preparation for transferring it to wood.
Subscribe to:
Posts (Atom)