Sunday, January 20, 2013

Gluing the Side to the Front Soundboard

Once I had the side bent to a shape that was close to the final desired shape, I glued it in place against the front soundboard.  There is very little material to hold the two pieces together so the joint is assisted by the use of kerf blocks.  These are small blocks that line the joint and give extra material for each piece to glue to.
The kerfing is made by first cutting a long strip of poplar wood into a triangle cross-section.  Then about every quarter of an inch you cut almost all the way through the wood so that the strip ends up as a flexible piece that can bend around the shape of the guitar curves.
Here's a picture of the kerf strip as I made it:

It was difficult to make the strip as flexible as I wanted it without breaking it.  I decided as I was using it that I would use it mostly as individual blocks instead of as one long strip.  You don't lose much strength that way and it is easier to manage.  Here is how it looked after gluing one side in place:

I'll do the other side the same way next.


Friday, January 4, 2013

Bending the Sides

This was easily the trickiest part of the project so far.  I was not really sure how thick the wood could be when I started.  Some of the videos I had seen online showed really thick pieces being bent.  So my first attempts were with wood that was about twice as thick as it should have been.  With the tight curves of my bending form there was no way to make it work.
After several attempts, each with a lesson to be learned, I was finally successful.  I found that I could reliably cut the wood as thin as I needed by using just my table saw.  One pass from each side and I could cut all the way through.  I needed the wood to be about 0.1 inch thick.  I needed it to be already very flexible before I steamed it.  Here's an example of the wood before steaming.  I'm holding it on the floor between my feet.


After getting the steam box going, I put one of the side pieces in at a time and let it steam for about 30 minutes.  I found that it worked a little better if I soaked the wood in water before I started.  Without that step, the wood seemed to want to curl a bit across the short dimension.

Once I pulled the wood out of the steam box, I had only a short time to get it on the form and clamped into position.  Here is what it looked like:


Some things to note...
I found that a scrap piece of PVC pipe fit right into the waist of the side and so I clamped that in first.  Then, instead of individual clamps on the ends, I put a long block across each end and then used two long clamps to pull them together.  This combination kept the piece firmly against the form.  I also added a couple of guide blocks to help me keep the wood straight against the edge of the form.  I moved these guide blocks to the other side for the next piece of wood I bent.  Doing so lets me end up with two sides that will have a straight edge facing the same direction.


The picture above shows the side after removing it from the form.  It turns out my work was not finished there.  While the wood generally holds its shape, it springs back several inches from the form once the clamps are removed.  Before gluing, the sides need to have a shape very near what they will eventually have or else simple glue will not hold them in place.  One of the things I did was to wet the wood again, put it back on the form and then use a hair dryer to really heat up the wood.  The heat seems to be the key and this worked well.

Building the Bending Form


Once the the wood is removed from the steam box it needs to be placed on a form so that it retains its shape after it cools.  I built a form by taking some scrap wood and cutting two pieces that were the same shape as the front and back of the guitar will be.  I used the same template from the front and back to make the shape of the form.  I joined the two pieces with the necessary wood to make the form wide enough for my bent pieces.  Here is what the finished form looked like.


Notice that I cut some square holes in the form to accept clamps.  Also, I added some aluminum flashing over the top of the form (not shown) to add some support in the middle.  I'll use the same aluminum under the clamps just to lessen the chance of having the wood split.


Building the Steam Box


There are several ways to bend the wood for the sides.  You can look on YouTube and find examples of these.  I chose to build a small steam box to make the wood pliable enough to bend.  I first assembled the body of the box from 4 long pieces of poplar wood using slotted joints and screws.  I didn't use glue because I thought the glue would just get messy when I turned on the steam.


I closed one end of the box with a small square of wood and then made a hole near that end in one of the side pieces.  This hole was overlaid with a large square piece of wood with the same hole in it.  The large square wood will sit on top of a pot of boiling water so that all the steam has to enter the steam box.  The other end of the steam box was left open for steam to escape.  While using the steam box, the open end will be covered only with a damp cloth.  I used a camping stove in my garage to heat the pot of water and fill the box with steam.  You can't see the pot of water in this picture, but it is there.  You can see the green metal of the camping stove.  I nailed together a few pieces of 1x1 just to hold the box up at a slight angle.  This provides a steady flow of steam through the box.


Wednesday, January 2, 2013

Head Block and Tail Block

The head block is the block of wood that joins the neck and the body of the guitar.  I made it by stacking and joining 4 pieces of 1" thick mahogany wood and then trimming to size.  One side gets a slot to receive the neck and another side gets a slot to allow access to the neck rod.  The neck and the head block will be joined by wooden dowels.  This is the completed head block:

And here is the head block after gluing it to the front soundboard:
The tail block is a simpler piece that is there mainly to provide a surface to glue the sides to as they meet at the opposite end from the neck.  I cut it out of a single piece of mahogany.

Monday, October 1, 2012

Bracing the Soundboard

On the back or inside of the soundboard, hidden from view in the finished guitar, is a series of braces designed to add rigidity without dampening the sound.  The pattern for the bracings is pretty standard in modern guitars.

First, I drew the pattern on the soundboard.
I rough-cut the braces according to the book instructions and then shaped them as needed.  Each of the braces is arched on the bottom so that it helps hold a slight curvature in the soundboard.  Here's the main X-braces being glued:
And then when the glue dried and the soundboard was laid flat you could see the edges lifted up with the curvature.
After all the braces were added and shaped on top as well, here's the final soundboard.  The edges of the soundboard will be trimmed later in the assembly.  You can see that there are several diamond shapes that help hold the soundboard seam together and there is a flat bridge piece that will serve to secure the bridge later.


Saturday, April 21, 2012

Installing the Rosette

Once sound hole is cut in the front face of the guitar, there is considerably less strength in that panel.  For that reason, many guitars add a rosette around the hole to bolster that area.  Rosettes come in all types of designs and materials and can have a big impact on the appearance of the guitar.  While some people make their own rosettes from wood or other material, I chose to purchase a prefabricated one online.  I was pretty sure mine would turn out poorly and ruin the look of the guitar.

The rosette I purchased is about 1/32" thick.  That means I needed to remove that much wood from my front panel in the shape of the rosette so it would sit flush with the panel.  I rigged up something so I could use my router to do the work.

First, I added a piece of wood onto the bottom of the router base for reasons I'll explain below.  I screwed it to the router base with countersunk screws and left an opening for the router bit to come through.

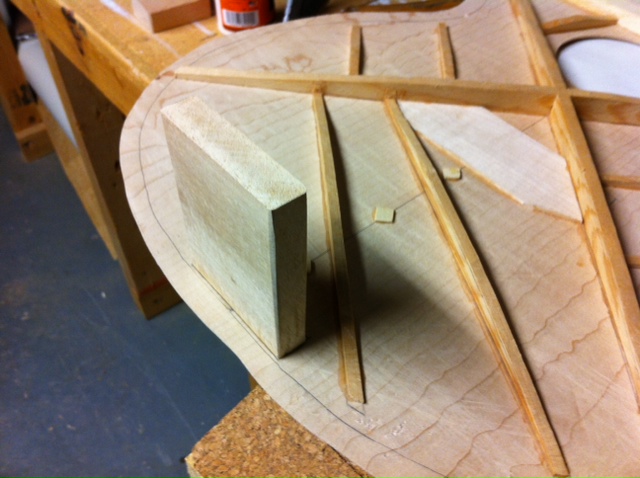
Next, I took what was left of the 3/16" rod I used for the truss rod and cut a piece about 3/8" long from it.  On a piece of thin plywood I practiced what to do by first drilling a center hole big enough for the 3/16" rod piece.  Then I calculated how far from the center of the 1/2" router bit I was using that I would need for making the first of two cuts for the circular groove.  At that location, I drilled a hole in the router base attachment to accept the other end of the rod piece.  So essentially I would have a common point of rotation between the router and the guitar panel.

Below is the plywood I practiced on a couple of times.  You can see the center hole of each circle.  That's where I had the small rod piece which also went up into the router base.  I spun the router around with the bit set to cut 1/32" deep.  Since my bit was only 1/2" and my rosette is 5/8" wide, I had to make two cuts by making a second hole in the router base in which to put the rod piece.

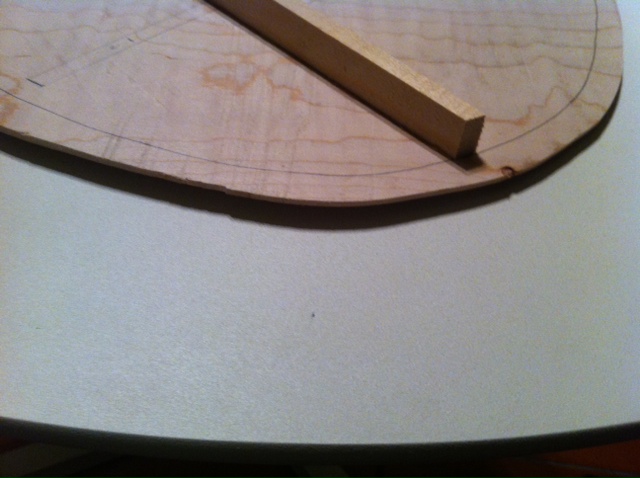
Here's the front panel with the rod piece installed:

 And here it is after routing the groove:

Finally, with the rosette sitting on the panel but not yet glued in.  I'll cut the sound hole opening later.  The rosette comes with a slot on one side so that it has more flexibility.  This will be covered by the fretboard later.